Categories

A well-fitting shirt collar is essential for comfort and style․ Proper collar sizing ensures a polished look and prevents discomfort․ Learn how to measure accurately for the perfect fit․
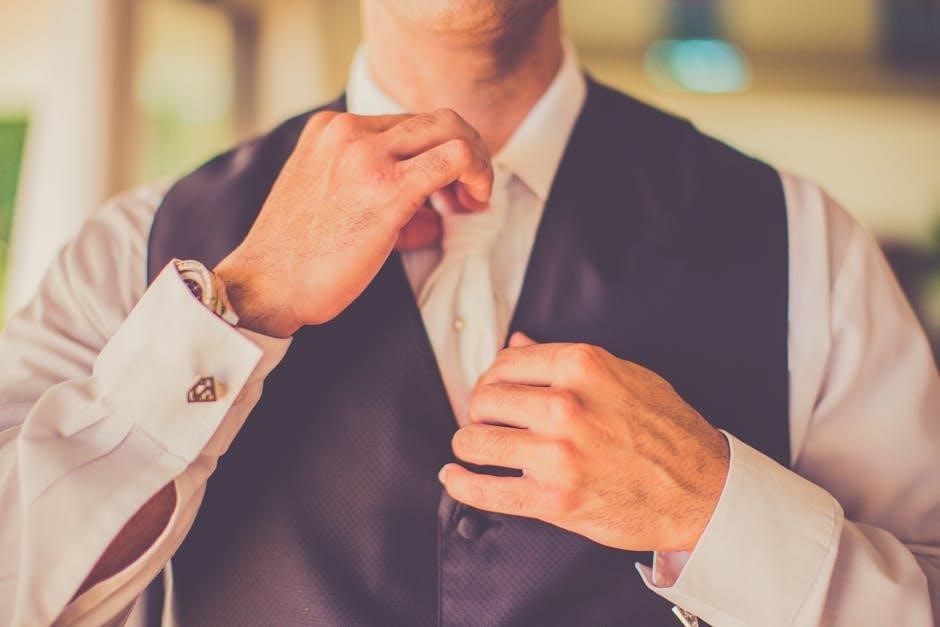
A proper collar fit is crucial for both comfort and aesthetics․ A collar that is too tight can restrict movement and cause discomfort, while one that is too loose may appear unprofessional․ Ensuring the right fit enhances the overall appearance of the shirt, making it look polished and tailored․ Additionally, a well-fitting collar contributes to the longevity of the shirt by preventing unnecessary strain․ Understanding the importance of collar fit is the first step toward achieving a shirt that feels great and looks sharp, whether for formal or casual occasions․

Measuring collar size involves determining the circumference of the neck where the collar sits․ A flexible tape measure is typically used, wrapped snugly around the neck, leaving room for comfort․ The measurement is then compared to standard size charts to find the ideal fit․ Accurate collar measurement ensures the shirt neither restricts movement nor appears overly loose․ This process is essential for achieving a comfortable and polished fit, whether for casual or formal attire․ Proper measurement also helps in selecting the right shirt style and size for individual preferences and needs․
Wrap a tape measure around your neck at collar height, ensuring a snug fit․ Add half an inch for comfort and precise measurement․

To measure your collar size accurately, follow these steps:
This process ensures a precise fit, avoiding discomfort and style issues․
A flexible measuring tape is the primary tool for measuring collar size․ Ensure it is not too stiff or stretchy․ If unavailable, use a string wrapped around your neck and measured with a ruler․ For existing shirts, lay the collar flat and measure from the center of the button to the end of the buttonhole using a ruler; Modern apps can also guide virtual measurements․ Having these tools ensures precision, avoiding errors and discomfort․ Proper tools are key to achieving an accurate collar size for a perfect fit․
For a comfortable fit, ensure the tape measure isn’t too tight or too loose․ Allow one finger between the tape and your neck for breathability․ When measuring an existing shirt, lay it flat to avoid distortions․ Consider fabric shrinkage, especially for custom orders․ Professional tailors can offer precise adjustments․ Regularly update your measurements to account for body changes․ Proper posture during measurement ensures accuracy․ Remember, comfort and fit go hand-in-hand, so take your time to get it right for a shirt that feels tailored to you․

Shirt collar size charts provide standardized measurements to help determine the perfect fit․ They include collar, chest, and sleeve measurements, ensuring accuracy and comfort for all body types․
Standard collar sizes typically range from 14 to 19 inches for men, with half-inch increments for precision․ These sizes correspond to shirt sizes, ensuring a tailored fit․ For example, a 15-inch collar generally fits Small to Medium shirts, while larger sizes like 18-19 inches cater to XL or XXL shirts․ Proper measurement involves wrapping a tape around the neck, leaving space for one finger․ This range ensures comfort and style, accommodating various body types and preferences, while maintaining industry standards for accuracy and reliability in sizing․
Shirt collar sizes vary slightly across US, EU, and UK standards, with differences in measurement approaches․ US sizes are typically measured in inches, while EU sizes use centimeters․ For example, a 15-inch US collar corresponds to a 38-39 cm EU size․ UK sizes align closely with US measurements but may differ in labeling․ Understanding these differences is crucial when shopping internationally․ Always refer to size charts to ensure accuracy, as conversions may vary slightly between brands․ Proper comparison ensures a consistent fit across regions and brands, enhancing comfort and style regardless of origin․
Using size charts effectively ensures a perfect fit for your shirt․ Start by matching your collar measurement to the chart, then cross-reference with chest and sleeve lengths․ Ensure the collar size aligns with your neck measurement, allowing a small space for comfort․ Compare your measurements to the chart’s ranges, selecting the size that best fits all dimensions․ Double-check the chart’s instructions, as some brands may adjust for shrinkage or fit preferences․ By carefully following the chart, you can achieve a tailored fit that balances comfort and style, ensuring your shirt looks and feels its best․
Common mistakes include measuring too tightly or loosely, forgetting to add comfort space, and ignoring shirt style differences․ Avoid these errors for accurate collar size determination․
One common mistake when measuring collar size is neglecting to account for comfort space․ A collar that is too tight can restrict movement and cause discomfort, while a collar that is too loose may lack structure․ To ensure a comfortable fit, always allow for a small amount of space between the tape measure and your neck․ A good rule of thumb is to leave enough room for one or two fingers to fit snugly under the tape․ This ensures the collar sits comfortably without feeling restrictive, providing both style and ease of movement throughout the day․
Different shirt styles require varying collar measurements to ensure proper fit․ For example, dress shirts often need a slightly larger collar for comfort, while casual shirts may fit better with a slimmer collar․ Ignoring these differences can lead to an ill-fitting shirt․ Always consider the shirt’s intended use and style when measuring․ For instance, a button-down collar may require additional space for the buttons to lie flat․ Adjusting your collar measurement based on the shirt style ensures a balance of comfort and aesthetics, preventing a collar that feels too tight or looks too bulky․

Various collar styles, such as classic, slim, spread, and point collars, have unique fit requirements․ Each style impacts how the collar sits and complements your physique and shirt design․
The classic collar offers a timeless look with a wider spread, suitable for various face shapes and body types․ In contrast, the slim collar is narrower, providing a modern, streamlined appearance․ Both styles require precise measurements to ensure comfort and aesthetics․ The classic collar is versatile, while the slim collar is ideal for those seeking a sleek, contemporary fit․ Understanding these differences helps in choosing the right collar style to enhance your overall shirt fit and personal style effectively․
The spread collar features a wider distance between the collar points, creating a more formal and elegant appearance․ It is ideal for those with round or shorter faces, as it elongates the neck․ In contrast, the point collar has a narrower spread, offering a sleek, versatile look suitable for most face shapes․ Both styles require precise collar size measurements to ensure comfort and a polished look․ The spread collar is often paired with ties, while the point collar works well for both casual and formal settings, making it a popular choice for everyday wear․
Specialty collars, like the Cuban and Wingtip, offer unique styling options․ The Cuban collar is open and relaxed, often seen on summer shirts, while the Wingtip is formal, typically paired with bow ties․ Both require precise measurements to ensure comfort and aesthetics․ The Cuban collar sits lower on the neck, offering a breathable, casual look, while the Wingtip collar is taller and more structured, designed for formal occasions; Understanding these styles helps in selecting the right collar for your needs, ensuring both comfort and style are balanced perfectly․
Collar size significantly impacts overall shirt comfort and aesthetics․ A proper fit ensures ease of movement, while incorrect sizing can cause discomfort or an unflattering appearance․

A properly sized collar ensures maximum comfort, allowing unrestricted neck movement and preventing irritation․ A collar that is too tight can cause discomfort and restrict breathing, while one that is too loose may look unpolished and lack support․ Achieving the perfect balance is crucial for all-day wearability and confidence․ Proper measurement techniques, such as wrapping the tape snugly around the neck with a finger’s space for comfort, help determine the ideal size․ This balance ensures the shirt feels tailored to your body, enhancing both comfort and style seamlessly․
Balancing collar size with chest and sleeve measurements is crucial for a tailored fit․ A well-fitted collar complements the chest measurement, ensuring the shirt sits comfortably across the torso․ Sleeve length should also align proportionally with the collar and chest to maintain harmony․ Properly balancing these elements ensures the shirt looks and feels polished․ A mismatched collar size can disrupt the overall fit, making the shirt appear too tight or loose․ Always consider these measurements collectively to achieve a seamless, flattering silhouette that enhances comfort and style․
Collar size significantly influences a shirt’s aesthetic appeal, as it frames the face and neckline․ A proportionate collar enhances facial features and creates a balanced look․ Too large a collar can overwhelm the frame, while too small a collar may make the neck appear shorter․ The style of the collar, such as spread or point, further impacts the overall appearance․ A well-chosen collar size ensures the shirt complements the wearer’s physique and personal style, making it a crucial element in achieving a polished, put-together look․ Proper sizing is key to maximizing both comfort and visual appeal․

Measure collar size by laying the shirt flat․ Place the tape measure from the center of the button to the far edge of the buttonhole․ Keep the collar tight for accuracy․
Laying the shirt flat is crucial for accurate collar measurement․ Place the shirt on a smooth surface, ensuring the collar is straight and wrinkle-free․ Spread the collar band evenly, aligning the button and buttonhole․ This method ensures precise measurement and avoids distortions caused by folds or creases․ Proper alignment guarantees accurate collar size determination, helping you find the perfect fit for your next shirt․ Always ensure the shirt is completely flat and the fabric is not stretched or bunched up during measurement․
To measure collar size from button to buttonhole, lay the shirt flat and locate the button at the center of the collar․ Align the buttonhole directly across the collar band․ Using a ruler or tape measure, draw a straight line between these two points․ Measure the distance precisely, ensuring the tape is taut and aligned with the collar’s edge․ This method provides an accurate collar size by focusing on the functional part of the collar․ Proper alignment ensures the measurement reflects the collar’s intended fit, avoiding errors caused by misalignment or fabric bunching․
Once you’ve measured the distance from button to buttonhole, round the measurement to the nearest half-inch or centimeter․ This value corresponds to your collar size․ For example, if the measurement is 15․3 inches, round to 15․5 inches․ Add half an inch to account for comfort and fabric shrinkage, ensuring the collar fits snugly without being too tight․ Compare this adjusted measurement to standard size charts to determine your collar size accurately․ This method ensures a precise fit, making it easy to select shirts that match your measurements for optimal comfort and style․

For precision, consider professional tailors, account for fabric shrinkage, and adjust measurements based on personal fit preferences to ensure a bespoke shirt that meets your unique needs perfectly․
Engaging a professional tailor ensures meticulous attention to detail, offering precise collar measurements tailored to your body․ They use high-quality tools and techniques to craft custom shirts that fit perfectly, enhancing both comfort and aesthetics․ A tailor can also accommodate unique preferences and fabric considerations, providing a flawless fit that off-the-rack shirts often lack․ Their expertise guarantees accuracy, making them an invaluable resource for achieving a polished, custom look․
Fabric shrinkage can impact collar fit, especially with natural fibers like cotton․ To address this, tailors often add a small allowance to measurements․ For instance, Proper Cloth adds 0․4 to the collar size to compensate for shrinkage․ This ensures the shirt fits perfectly even after washing․ When measuring, consider the fabric type and its shrinkage potential․ Always consult a tailor or refer to size charts that account for shrinkage․ This step is crucial for maintaining a consistent fit and avoiding a collar that becomes too tight over time․
Personal fit preferences play a significant role in achieving comfort and style․ Some individuals prefer a snug collar for a tailored look, while others opt for a looser fit․ To accommodate this, measurements can be adjusted by adding or subtracting small increments․ For example, adding 0․25 inches for a relaxed fit or subtracting 0․25 inches for a trimmer appearance․ Consider the shirt’s intended use—business or casual—and the collar style, as spread collars may require slightly different adjustments․ Ultimately, customization ensures the shirt meets individual comfort and aesthetic goals, making it truly personalized․ This step enhances both functionality and satisfaction․
Achieving the perfect collar fit enhances comfort, style, and confidence․ By following measurement guides and personalizing fit preferences, you ensure a tailored look and optimal shirt performance․

Measuring your collar size accurately is crucial for a comfortable and stylish fit․ Wrap a flexible tape measure around your neck at the base, ensuring it’s snug but not tight, and leave room for one finger․ For existing shirts, measure the collar from the center of the button to the end of the buttonhole․ Avoid common mistakes like measuring too tightly or loosely and forgetting to account for comfort space․ Consider fabric shrinkage and personal fit preferences, especially when opting for custom shirts․ By following these principles, you ensure a polished look and optimal comfort in every shirt․
By following these tips, you can achieve a collar fit that combines comfort, style, and precision, ensuring your shirts look and feel their best․