Categories


Navigating infant car seat safety requires diligent attention to detail, ensuring your little one’s well-being during every journey. This guide provides comprehensive instructions, covering installation, harnessing, and maintenance of Safety 1st infant car seats, referencing resources from April 22, 2026.
Prioritizing infant car seat safety is paramount for protecting your child during vehicle travel. Experts consistently recommend keeping children rear-facing for as long as possible, maximizing protection in the event of a collision. Safety 1st car seats, like the Grow and Go 3-in-1 and MultiFit EX Air 4-in-1 models, are designed with this principle in mind.
Understanding weight and height limits is crucial; for example, the Grow and Go allows rear-facing use up to 40 lbs (18 kg) and 40 inches. Proper installation, utilizing either the vehicle seat belt or the LATCH system, is non-negotiable. Always consult both the car seat manual and your vehicle’s owner’s manual for specific guidance.
Furthermore, ensuring a snug harness fit – neither too tight nor too loose – is vital. Regularly check for recalls and remember that this guide isn’t a substitute for complete manufacturer directions. SafetyBeltSafe U.S.A. provides additional resources.
Selecting the appropriate Safety 1st infant car seat involves considering your vehicle, your baby’s size, and your lifestyle. Safety 1st offers a range of options, including the OnBoard 35 LT (rear-facing only) and convertible models like the Grow and Go 3-in-1 and MultiFit EX Air 4-in-1.
Rear-facing only seats, such as the OnBoard 35 LT, are ideal for newborns and smaller infants. Convertible seats offer extended rear-facing capabilities, allowing your child to remain rear-facing up to 40 lbs and 40 inches, as recommended by safety experts.
Consider features like ease of installation, harness adjustability, and fabric washability. Review user guides (available as PDFs) for specific models to understand their capabilities. Prioritize a seat that fits your vehicle correctly and allows for a secure installation using either the LATCH system or vehicle seat belt.
A Safety 1st infant car seat comprises several key components working together to ensure optimal protection. These include the car seat shell, a five-point harness system with a buckle and adjustable straps, and height adjusters for growing infants. The base, crucial for installation, features LATCH connectors and belt guides.
The buckle mechanism is designed for secure fastening, with options to shorten the buckle for smaller infants by adjusting the anchor straps. A tether strap enhances stability, particularly in forward-facing configurations. Understanding how these components interact is vital for correct usage.
Refer to the user guide (like those for the Grow and Go or MultiFit EX Air) for detailed diagrams and explanations of each part. Regular inspection of these components ensures continued functionality and safety.
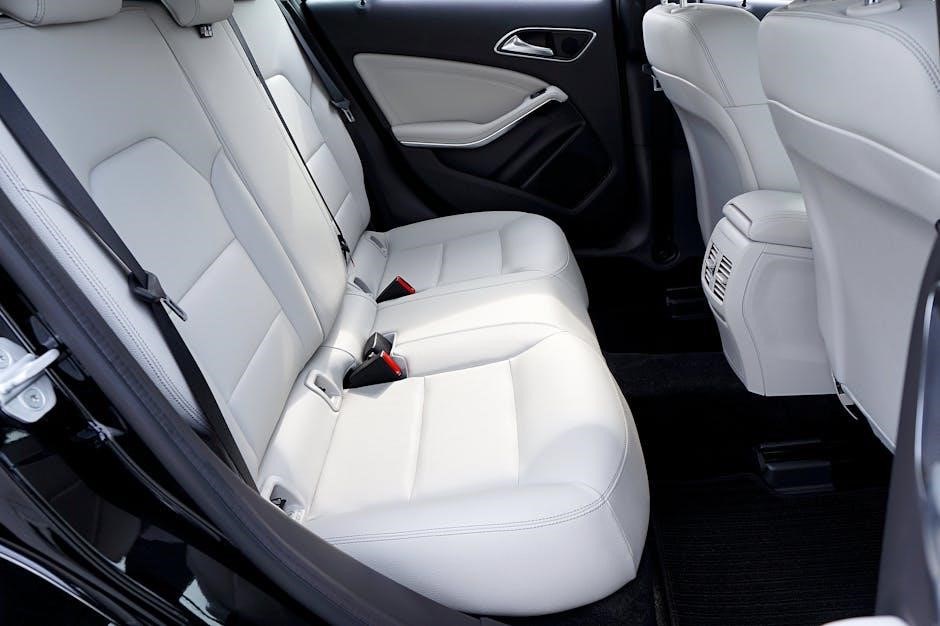
Proper installation is paramount for rear-facing only Safety 1st infant car seats, ensuring maximum protection in a crash. Two primary methods exist: vehicle seat belt installation and utilizing the LATCH system. Always consult your vehicle’s owner’s manual alongside the car seat instructions.

When using the seat belt, thread it through the designated belt path, ensuring a snug fit. For LATCH installation, connect the lower anchors to the vehicle’s anchor points, then tighten the strap. Remember to push firmly on the back of the seat while tightening the tether strap for added stability.
Verify a secure installation – the seat should not move more than one inch side-to-side or front-to-back at the belt path. Prioritize a proper angle for infant comfort and safety.
Securing your Safety 1st infant car seat with the vehicle seat belt demands precise execution. Begin by routing the belt through the correct path, as indicated in your car seat’s manual. Ensure the belt lies flat and isn’t twisted. Lock the seat belt mechanism; many vehicles have a locking latch plate that clicks when engaged.
Once locked, firmly press the car seat into the vehicle seat while simultaneously pulling the seat belt tight. Eliminate any slack by applying your weight. To shorten the buckle strap for smaller infants, feed the anchor through the slot closest to the seat’s back, then up through the middle slot.
Confirm a secure fit – minimal movement (under an inch) side-to-side or front-to-back is crucial.
Utilizing the LATCH (Lower Anchors and Tethers for Children) system offers a convenient and secure installation method. Locate the lower anchors in your vehicle’s seat bight – the space between the seat cushion and backrest. Connect the car seat’s lower anchor connectors to these vehicle anchors, ensuring a positive click confirms a secure attachment.
After connecting the lower anchors, firmly press the car seat into the vehicle seat. Tighten the LATCH straps to eliminate any slack, achieving a snug fit. Remember to also utilize the tether strap when forward-facing (if applicable to your car seat model), pushing firmly on the seat back while tightening.
Verify minimal side-to-side or front-to-back movement – less than an inch is ideal.
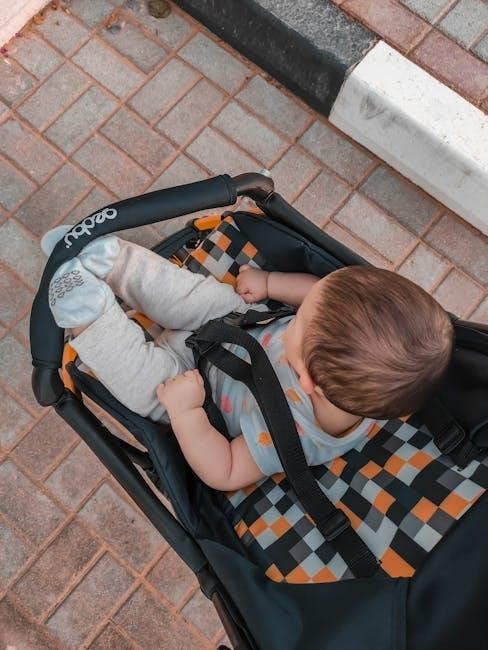
Proper harnessing is paramount for your infant’s safety within the car seat. Begin by ensuring the harness straps are at the correct height – typically, shoulder straps should be at or below your child’s shoulders when rear-facing. Buckle the harness straps into the buckle, listening for a distinct click, and confirm the buckle is securely fastened.
To achieve optimal tightness, grasp the harness straps at your child’s shoulders and pull firmly. You should not be able to pinch any excess webbing at the collarbone. Regularly check harness tightness, as clothing can compress and loosen the straps. Ensure the harness and buckle fit correctly before installing the restraint.
Always double-check the harness before each trip!
Correct harness height is crucial as your infant grows. Safety 1st car seats feature adjustable harness straps to accommodate your child’s increasing size. To adjust, first, ensure the car seat is not occupied. Locate the harness adjustment mechanism – typically found at the top of the shoulder straps or in the back of the seat.
Release the current harness height setting and reposition the straps to the appropriate slot. For rear-facing infants, the straps should be at or below the shoulders. As your child grows, move the straps up to maintain this correct positioning. Always re-thread the harness when adjusting the height to ensure secure placement. Verify the adjustment by checking strap position after re-buckling.
Regular adjustments are key for continued safety!

Securing your infant correctly begins with mastering the harness buckle. To buckle, squeeze the harness tabs together and insert them firmly into the buckle until you hear a distinct “click.” Ensure both sides are securely latched. To unbuckle, locate the red release button on the buckle and press it – the harness tabs will release.
Always check that the harness is fully engaged after buckling. A loose or improperly fastened harness compromises safety. Before each trip, practice buckling and unbuckling to become familiar with the process. Make sure the harness and buckle fit your child correctly before installing the restraint.

Remember, a secure buckle is a safe buckle!
Ensuring a snug harness fit is crucial for optimal protection during a crash. After buckling and adjusting the harness, perform the “pinch test.” Attempt to pinch the harness webbing at your child’s shoulder. If you can pinch any excess webbing, the harness is too loose and needs tightening.
Tighten the harness by pulling on the adjustment strap until the webbing lies flat against your child’s shoulders and you can no longer pinch any slack. Re-check the tightness after each adjustment. Remember, the harness should be snug enough to prevent excessive forward movement in a collision, but not so tight as to cause discomfort.
Regularly verify harness tightness throughout your journey, as it can loosen with movement.
As your infant grows, the harness needs to be adjusted to maintain proper positioning and safety. Re-threading involves changing the height of the harness straps to accommodate your child’s increasing size. Locate the harness slots – these are the openings where the straps pass through the car seat shell.
Unbuckle the harness completely. Remove the harness straps from the current slots. Select the appropriate slots based on your child’s height and shoulder level; the straps should be at or just below shoulder height. Re-insert the harness straps through the new slots, ensuring they are securely threaded. Double-check that both sides are at the same height.
Finally, re-buckle the harness and perform a tightness check to confirm a secure fit.
The tether strap is a crucial safety feature, especially during forward-facing installation, minimizing head excursion in a crash. Locate the tether strap – it’s a webbing strap attached to the top of the car seat. Identify the tether anchor point in your vehicle; consult your vehicle owner’s manual for its location.
Attach the tether strap hook to the vehicle’s anchor point. With your knee still positioned in the child restraint, firmly push on the back of the seat while simultaneously tightening the tether strap. This eliminates slack and secures the car seat to the vehicle. Ensure the tether strap is snug but not overly tight, allowing for slight movement.
Regularly check the tether strap’s connection and tightness before each journey.
Transitioning to forward-facing requires careful attention to weight and height limits, ensuring your child meets the criteria. Before installation, verify your child hasn’t exceeded the rear-facing limits (up to 40lbs/40in). Re-thread the harness to the appropriate height for forward-facing mode, following the car seat’s manual.
Secure the car seat using either the vehicle seat belt or the LATCH system, ensuring a tight fit. Always utilize the top tether strap when forward-facing; it significantly reduces head movement during a collision. Experts recommend keeping children rear-facing as long as possible, maximizing safety.
Double-check the installation, confirming minimal side-to-side or front-to-back movement. Refer to pages 29-30 of the user guide and your vehicle’s owner’s manual for specific instructions.
Adhering to weight and height limits is paramount for optimal car seat safety. Safety 1st car seats have specific parameters designed to protect children at different stages of development. For rear-facing installations, the limit is generally up to 40 pounds (18 kg) and a height of 40 inches. Exceeding these limits compromises the seat’s protective capabilities.
When transitioning to forward-facing (for convertible seats), consult the car seat’s manual for the appropriate weight and height ranges. These limits vary by model. It’s crucial to remember that experts advocate for extended rear-facing, as it’s the safest position.
Regularly assess your child’s growth to ensure they remain within the specified limits. Ignoring these guidelines can significantly increase the risk of injury in the event of a crash.

Maintaining rear-facing positioning for as long as possible is a cornerstone of infant car seat safety. Safety 1st guidelines, as of April 22, 2026, generally allow for rear-facing use up to a maximum weight of 40 pounds (18 kilograms). Simultaneously, the child’s height should not exceed 40 inches. These limits are not arbitrary; they are based on rigorous testing to ensure the seat’s protective structure functions correctly.
Regularly check your child’s weight and height against these thresholds. Growth spurts can quickly lead to exceeding the limits. A properly installed rear-facing seat offers superior head, neck, and spine protection in a collision.
Prioritize rear-facing until your child reaches both the weight and height maximums, not just one.

Transitioning to forward-facing requires careful consideration of your child’s developmental stage and adherence to Safety 1st’s specified limits. While rear-facing is prioritized, forward-facing becomes an option once the child surpasses the rear-facing weight or height restrictions. However, specific forward-facing limits vary depending on the Safety 1st car seat model.
Consult your car seat’s manual for precise weight and height guidelines. Generally, forward-facing limits involve a minimum weight requirement and a maximum weight, alongside a height restriction. It’s crucial to verify these parameters before switching orientations.
Remember, exceeding these limits compromises the seat’s safety performance. Always prioritize the manufacturer’s recommendations and ensure a secure fit.
Maintaining a clean and well-maintained Safety 1st infant car seat is vital for hygiene and optimal functionality. Regular cleaning removes spills, crumbs, and potential irritants, ensuring a comfortable and safe environment for your child. Always refer to your car seat’s manual for specific cleaning instructions, as materials and methods vary.
Typically, the car seat cover is removable and machine washable, using mild detergent and a gentle cycle. The harness straps can be cleaned with a damp cloth and mild soap. Avoid harsh chemicals or abrasive cleaners, as they may damage the fabric or components.
Periodically inspect the car seat for any signs of wear and tear, ensuring all parts are securely fastened. Proper maintenance extends the lifespan of the car seat and guarantees continued safety.
Prioritizing your child’s safety necessitates regularly checking for any recalls affecting your Safety 1st infant car seat. Manufacturers occasionally issue recalls due to potential safety concerns, and staying informed is crucial. Recalls address defects that could compromise the car seat’s performance in a crash.
You can check for recalls on the manufacturer’s website (Safety 1st) or through the National Highway Traffic Safety Administration (NHTSA) website. Inputting your car seat’s model number and manufacturing date will quickly reveal any active recalls.
Important: An information sheet emphasizes that recall lists are constantly updated and should not be substituted for complete manufacturer directions. Addressing a recall promptly ensures your child’s car seat meets current safety standards.
When installing your Safety 1st infant car seat using a vehicle’s lap/shoulder belt, meticulous attention to detail is paramount for optimal safety. Experts emphasize ensuring the harness and buckle fit your child correctly before installing the restraint. Review pages 29-30 of the user guide, alongside your vehicle owner’s manual, to determine the correct belt path.
Confirm the lap belt lies flat and low across the hips, and the shoulder belt rests snugly across the collarbone, away from the neck. Avoid twisting the belt, as this can reduce its effectiveness.
Remember: A secure installation is vital. Push firmly on the back of the seat while tightening the tether strap (when applicable) to minimize movement.
Achieving the correct recline angle is crucial for infant car seat safety, ensuring your baby’s airway remains open and protected. While specific angle requirements vary by model, maintaining the proper incline prevents head slump, a potentially dangerous situation during travel. Refer to your Safety 1st car seat’s user guide for precise angle indicators and adjustment instructions.
Many Safety 1st seats feature built-in recline indicators or adjustable bases. Carefully follow the steps outlined in the manual to achieve the recommended angle. Regularly check the angle, especially after installation or if the seat is bumped or moved.
Important Note: Incorrect angle adjustment can compromise the seat’s protective capabilities. Prioritize a secure and properly reclined position for every ride.
The buckle and anchor system are fundamental to a car seat’s safety performance, securing your child firmly in place during a collision. Safety 1st car seats utilize a multi-point harness system, featuring a buckle that fastens securely and anchors that distribute impact forces. Understanding how these components work is vital for correct usage.
The buckle should click audibly when engaged, confirming a secure connection. Ensure the harness straps are not twisted and lie flat against your baby’s body. For smaller infants, the buckle anchor can be adjusted to provide a snugger fit by feeding it through different slots, as detailed in the user guide.
Regularly inspect the buckle and anchor for any signs of damage or wear. A compromised system must be replaced immediately to maintain optimal safety.
Maintaining proper posture while securing your child in the car seat is crucial for both safety and effective installation. Keeping your knee positioned in the child restraint during installation, specifically when tightening the tether strap, is a recommended practice by safety experts.
Applying firm pressure with your knee against the back of the car seat while simultaneously tightening the tether strap ensures a secure and stable installation. This technique minimizes movement and maximizes the car seat’s ability to absorb impact forces during a crash.
This method, highlighted in the Safety 1st Grow and Go 3-In-1 Convertible Car Seat guide, helps eliminate slack and confirms a tight fit, vital for protecting your child. Always consult your vehicle’s owner’s manual for specific tether strap usage instructions.
Your vehicle’s owner’s manual is an indispensable resource when installing a Safety 1st infant car seat. It contains critical information specific to your car model, detailing proper installation procedures and compatibility with LATCH systems or seat belt installations.
The manual outlines designated seating positions approved for car seat use, potential limitations, and the location of anchor points for tether straps. Referencing pages 29-30 of the Safety 1st Grow and Go guide emphasizes the importance of this step.
Understanding your vehicle’s features, such as seat belt locking mechanisms and tether anchor locations, ensures a secure and correct installation. Always cross-reference the car seat instructions with your vehicle’s manual to avoid conflicts and maximize safety for your child during travel.

For comprehensive assistance beyond this guide, several resources are readily available to support your Safety 1st infant car seat journey. SafetyBeltSafe U.S.A. (P.O. Box address available online) provides valuable information and support regarding car seat safety regulations and best practices.
Remember, this guide and any information sheets are not substitutes for the complete manufacturer’s directions. Regularly check for recalls affecting your specific Safety 1st model to ensure continued safety. The Dorel Safety 1st website offers downloadable user guides, like those for the Grow and Go (CC138) and MultiFit EX Air (CC204) models.
Don’t hesitate to contact Safety 1st’s customer support for personalized assistance with installation, usage, or any concerns you may have. Prioritize your child’s safety by utilizing these resources.