Categories
Welcome to the Viking Professional Oven Manual, your comprehensive guide to understanding and operating your high-performance cooking appliance. This manual provides essential information on safety, installation, operation, and maintenance to ensure optimal performance and longevity of your oven. Designed for both professional chefs and home cooks, it covers key features, cooking modes, and energy-efficiency tips. Read carefully to maximize your culinary experience and maintain your oven in pristine condition.
The Viking Professional Oven Series offers high-performance cooking solutions with advanced features designed for both professional chefs and home cooks. Available in gas and electric models, these ovens deliver precise temperature control, multiple cooking modes, and energy-efficient performance. Built with durable materials, they combine sleek designs with robust functionality, ensuring long-lasting reliability. Whether for commercial or residential use, the Viking Professional Oven Series provides versatile cooking options, including convection, baking, and roasting, making it a trusted choice for culinary excellence and everyday meal preparation.
Reading the Viking Professional Oven Manual is essential for safe and effective operation. It provides critical safety precautions, installation guidelines, and operating instructions to prevent accidents and ensure optimal performance. The manual details proper usage of features, maintenance routines, and troubleshooting tips, helping you avoid costly repairs. By following the manual, you can maximize the oven’s capabilities, extend its lifespan, and enjoy a superior cooking experience. Failure to read it may lead to improper installation, safety hazards, or inefficient use of the appliance.
Always follow safety guidelines to avoid hazards. Install a manual gas shut-off valve and ensure proper ventilation. Keep flammable materials away and refer to the manual for specific warnings.
Adhere to all safety precautions to ensure safe operation. Install a manual gas shut-off valve for gas models and maintain proper ventilation. Avoid storing flammable materials near the oven. Keep children away from the appliance while in use. Never use the oven door to lift the appliance. Ensure the oven is properly grounded to prevent electrical hazards. Follow all warning labels and instructions provided in the manual. Regularly inspect for damage or wear and tear. Always turn off the oven when not in use to prevent accidents.
For gas models, ensure a manual shut-off valve is installed in the gas supply line for safety and easy servicing. Proper ventilation is crucial to prevent gas buildup. For electric models, always use a grounded electrical connection to avoid shock hazards. Never use commercial oven cleaners, as they can damage surfaces. Keep flammable materials away from both gas and electric models. Avoid overloading racks or using the oven as storage, as this can pose fire risks. Always follow specific guidelines for your model type to ensure safe and efficient operation.
Ensure proper installation by following the pre-installation checklist and step-by-step instructions. Verify electrical and ventilation requirements, and ensure the oven is properly grounded. Adhere to manufacturer guidelines for safe and efficient operation.
Before installing your Viking Professional Oven, ensure all pre-installation requirements are met. Verify the gas supply line includes a T-type handle shut-off valve for safety. Check electrical specifications, ensuring the oven is properly grounded and connected to the correct voltage. Measure the installation space to confirm dimensions match the oven’s size. Ensure proper ventilation and clearance from flammable materials. Review the wiring diagram located on the oven or in the control panel. Remove all packaging and protective coatings before connecting the appliance to power.
Begin by disconnecting the power supply and ensuring the gas shut-off valve is installed in the supply line. Carefully guide the oven into the prepared opening, aligning it with the surrounding cabinetry. Secure the appliance using the provided mounting hardware. Connect the gas line to the oven, ensuring no leaks. For electric models, connect the power cord to the designated receptacle. Install any additional components, such as ventilation systems, according to manufacturer guidelines. Double-check all connections for safety and compliance with local codes before powering on the appliance.
Mastering your Viking Professional Oven begins with understanding its intuitive control panel. Choose from various cooking modes, including convection and proofing, for precise results. Adjust temperatures effortlessly with digital controls, ensuring perfect doneness every time. The oven’s advanced sensors and even heat distribution guarantee consistent performance, whether baking, roasting, or broiling. Explore its versatile features to elevate your culinary skills and achieve professional-grade outcomes in the comfort of your kitchen.
The Viking Professional Oven’s control panel is designed for intuitive operation. Buttons and a clear display allow easy selection of cooking modes and precise temperature adjustments. Use the touchscreen or physical buttons to choose from options like bake, roast, or convection. The display shows current temperature, timer, and mode, ensuring accurate control. Advanced sensors monitor heat distribution, providing consistent results. The control panel also features a lock function to prevent accidental changes, enhancing safety. Refer to the manual for detailed guidance on all functions.
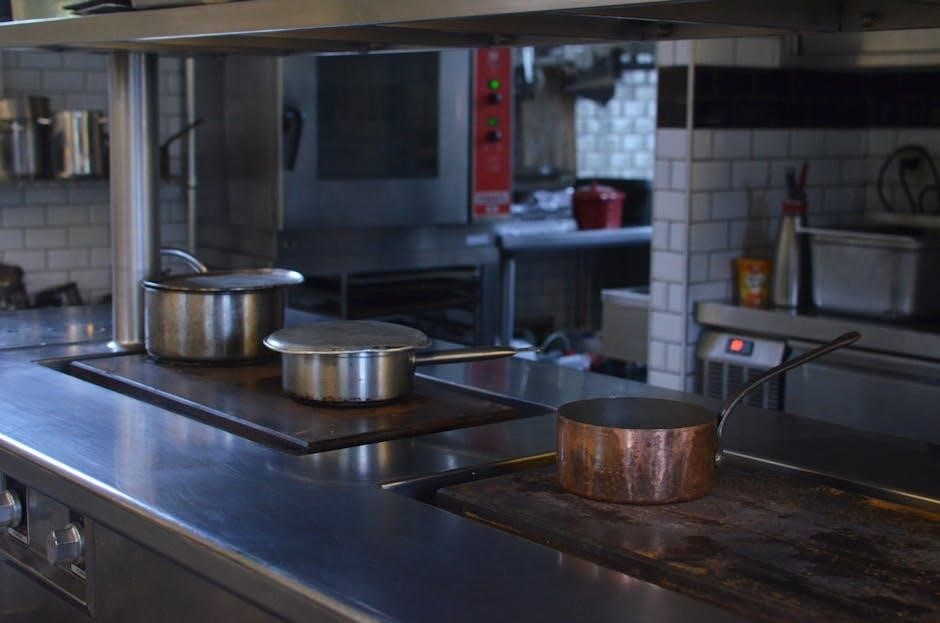
The Viking Professional Oven offers a variety of advanced cooking modes, including bake, roast, convection, proofing, and slow cook. Each mode is designed to deliver precise results, whether you’re cooking delicate pastries or hearty roasts. The convection mode uses fan-assisted heating for even cooking, while proofing maintains low temperatures for dough rising. The slow cook function ensures tender dishes over extended periods. Additional features like precision temperature control and smart sensors optimize cooking performance. Explore these modes to unlock the full culinary potential of your Viking oven.
The Viking Professional Oven excels in temperature control and precision, ensuring consistent cooking results. With advanced digital controls and smart sensors, it maintains accurate temperatures across various cooking modes. The oven features a dual-fan convection system for uniform heat distribution and a precision temperature probe to monitor meat and poultry internally. This ensures dishes are cooked to the perfect doneness every time. Additionally, the oven offers rapid preheating and low-temperature cooking options, making it versatile for both high-heat roasting and delicate baking. These features guarantee professional-grade performance in your home kitchen.

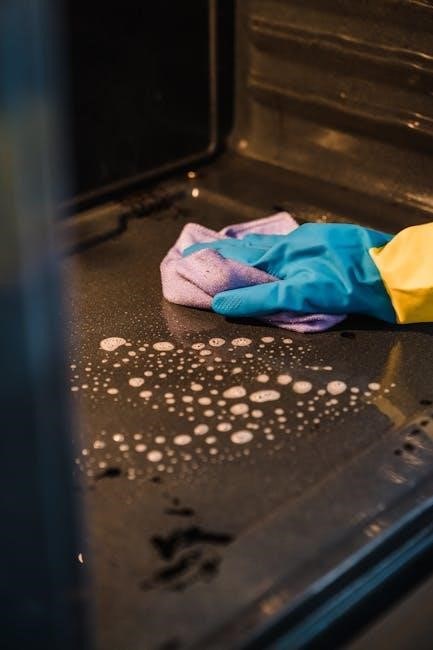
Regular maintenance and cleaning are crucial to ensure your Viking Professional Oven performs optimally. Avoid using abrasive cleaners or commercial oven sprays, as they may damage surfaces. Instead, wipe spills immediately with a damp cloth and use a mild soap solution for tougher stains. For interior cleaning, vinegar and water or a soft sponge can be effective. Always refer to the manual for specific cleaning guidelines to maintain your oven’s durability and performance.
Regular maintenance ensures your Viking Professional Oven operates efficiently. Clean spills immediately with a damp cloth to prevent hardening. For tougher stains, mix water and vinegar, avoiding harsh chemicals. Check oven racks and pans for food residue and wash them separately. Clean vent filters monthly to maintain airflow. Inspect door seals for wear and tear to ensure proper heat retention. Schedule annual professional inspections to address hidden issues. These routine tasks preserve performance, safety, and longevity, keeping your oven in optimal condition for years of reliable service.
For optimal results, clean your Viking Professional Oven gently to avoid damage. Avoid using harsh chemicals or abrasive cleaners, as they may harm the finish. Instead, use a mixture of water and vinegar or a soft sponge to wipe down surfaces. For tougher stains, apply a small amount of baking soda paste and let it sit before rinsing. Clean racks and filters separately with mild soap and warm water. Always refer to the manual for specific cleaning instructions tailored to your oven model to ensure longevity and performance.

This section helps identify and resolve common issues with your Viking Professional Oven. Consult the manual for error codes, ignition problems, or uneven heating solutions to ensure proper function.
Consult the manual to identify error codes displayed on your Viking Professional Oven. Common codes like E1 or E2 often indicate temperature sensor issues or faulty heating elements. Refer to the troubleshooting guide for specific solutions. For example, resetting the oven or cleaning igniter electrodes may resolve the problem. Always ensure proper ventilation and check for blockages in gas lines for gas models. If issues persist, contact Viking Customer Service for professional assistance. Regular maintenance and timely repairs ensure optimal performance and extend the lifespan of your appliance.
Common issues with the Viking Professional Oven include gas ignition problems, uneven heating, and error codes. For gas models, ensure the gas supply line is open and the igniter is clean. Check for blockages in burner ports and ensure proper ventilation. For electric models, verify electrical connections and circuit integrity. If the oven doesn’t heat, inspect the heating elements for damage. Refer to the troubleshooting guide for specific solutions. Always unplug the oven before performing DIY repairs. If issues persist, contact Viking Customer Service for professional assistance to avoid further complications.
Viking offers a comprehensive warranty program for professional ovens, including a one-year full warranty for parts and labor. For assistance, contact Viking Customer Service at 1-888-845-4641 or visit their website. Retain this manual for future reference and warranty claims.
The Viking Professional Oven is backed by a comprehensive warranty program. The standard warranty includes a one-year full warranty covering parts and labor for defective components. Additionally, a five-year limited warranty applies to major components like the oven cavity and burners. Coverage begins from the original purchase date and requires proper registration. Exclusions include normal wear and tear, misuse, or damage from improper installation. Retaining this manual and your purchase receipt is essential for warranty validation. Refer to the full warranty terms in the manual for detailed coverage and exclusions.
For assistance with your Viking Professional Oven, contact Viking Customer Service at 1-888-VIKING-1 (1-888-845-4641). Representatives are available to address questions, concerns, or service needs. You can also visit their official website at www.vikingrange.com for support resources, manuals, and troubleshooting guides. Additionally, email inquiries can be sent via the website’s contact form. For warranty-related matters or technical support, ensure you have your oven’s model and serial number ready. Retain this manual and receipts for reference when contacting customer service.